
Sorry for the delay in posts, I have been helping my mum redecorate a little which has largely involved me sanding floors and peeling wallpaper. Mind you I have not forgotten my duties for University so I have been exploring a few things for the upcoming dissertation. Anyway in other news (and what this post is about) has me finally getting down to some modelling. My focus has been on the Driver of course largely considering his head. I had already began structuring his face from the "Finding the Front" (FTF) post which I gradually twisted and changed from the low subdivide.
This good thing about creating a model low poly is that once you have its foundations you can divide them for further detail. When people talk about maintaining equal distance between edge loops the reason is so a person can divide it if need be to avoid pinching. Pinching is what can be seen on a mesh when a person pits to edges close together which is good when a person is looking to define an edge (e.g. a fold of a jacket, or collar, etc). Obviously this is not ideal for when a person is just looking to create a persons face or torso the key is to be strategic earlier on so the mesh can be used in various other ways.
The journey of my Driver's low poly Bust is as follows:
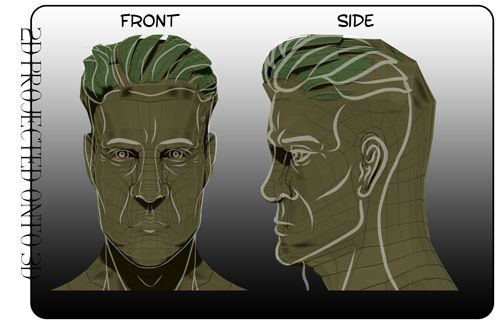
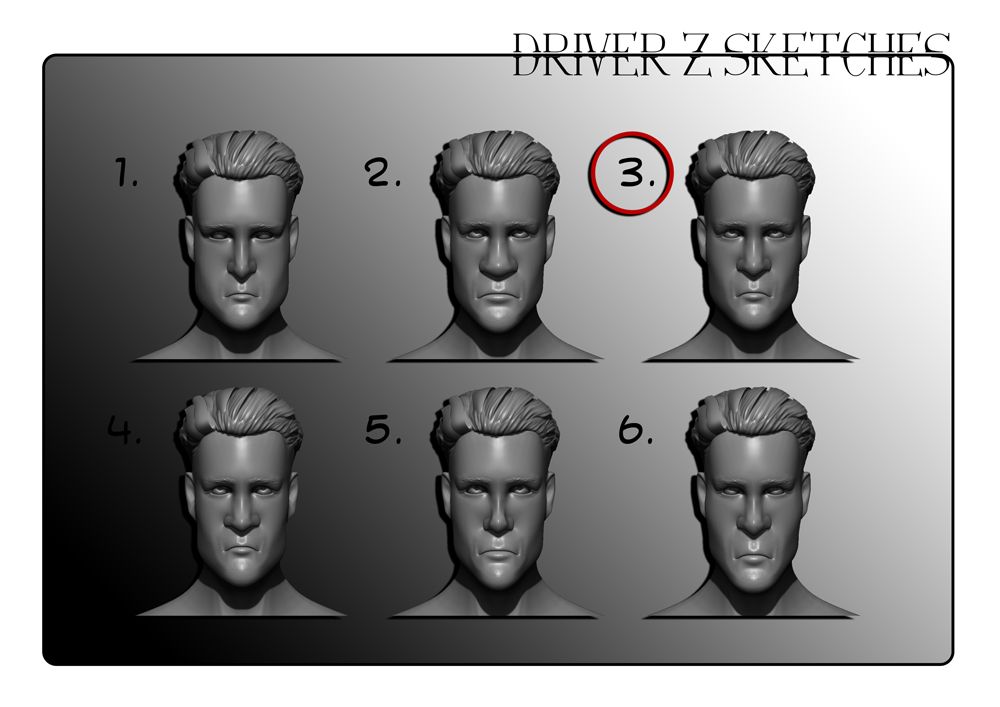
From the basic front and side profiles that I had created earlier (shown in expression sheets and FTF) I created a rather basic block head in Maya keeping things very low and basic. The important zones were obviously having enough edge loops for the eyes and mouth. The nose usually always inadvertently gets them from the top of the head. The ear was a little bit of a worry but it got there in the end. His hair is built into the head which some planes to be used as "strands" should the games engine have the functionality for wind which will simulate moving hair. Dressed with the right texture it looks no different.
I kept the process light so I could move the real detailing into ZBrush which is where I would localise and really refine his features. Maya is a good tool for box modelling and creating things very low but the question therefore becomes where do things move after Maya. The video above shows me refining some of the areas with ZBrush's image plane system. Before you ask yes I had to learn that from some reading material. Once I had it in though it was just a case of matching the planes as best as I could to his features maintaining what makes the Driver the Driver.

Next I moved the fight into ZBrush having established my Low Poly which I managed to get down to 1347 maintaining the key areas of the face. From there I took the face High and added a few little features namely stubble and eyebrows. The level of detail also keeps when you revert to the lower subdivides and move things so if I want to move his eyebrows and not have my detail suffer I can move it low and it will move the high clusters. This was perfect for playing with the proportions of his face to see if I could find any other things to adjust should he need it.
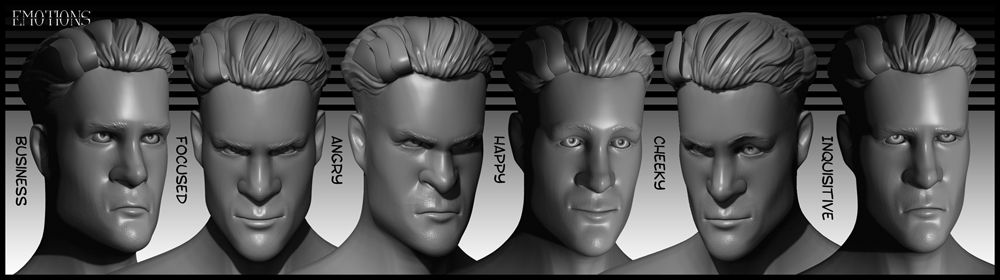
Last but not least came some basic expressions which I made just to prove my point about the low to high poly conversion. I managed to get the results in the Expressions image above by adapting the low poly which inevitably changed the high without costing me my detail. To do this I picked the favourites expressed by Tom and Phil from my 2D Expression sheets. I still love the Cheeky one the best but focused has grown on me. His face has character and that's what's really important here and I can really see some of these faces being pulled in the game :)
I am finally glad to be getting my hands dirt with a bit of 3D modelling but I have not forgot about my obligations to the final conceptual stages of this character and his cars of choice. I am happy with his final look, for me it really does fulfil the role of a 1930s off the books Noir Driver. Now I just have to figure out where to settle on final poly counts which no doubt will come in more when I get to finalizing the body (which I should have after tomorrow). All in all I think so far this is quite a nice success, only glad that I still have my head on my shoulders.
Take it easy!
xXStItChXx
Some amazing stuff here stitch :) REALLY can't wait to see it all finished :D
ReplyDelete