Sunday 5 August 2012

Summer Learning: Sculpting & Retopology

Hello Everyone,

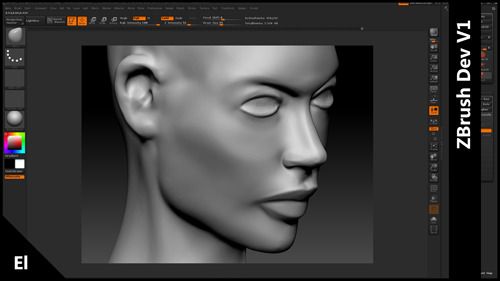
Coming in with another small update I used most of yesterday doing a re top of my original El mesh (V1). I decided to start recording videos as much as I like explaining the process I think its much cooler to see it working out in the flesh. To avoid boring piffle I decided to do it in time lapse so people are not bogged down by low grade failures on my part.

Anyway the videos on display for this post (below) focus on some detail sculpting within ZBrush & model re topology within "Topogun". For those who don't know or understand model topology I will provide a brief explanation below the videos.


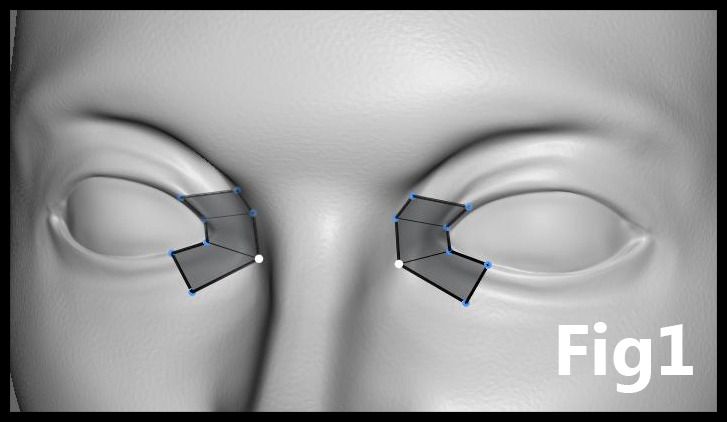
What is 3D model topology?

Each model is comprised of points (known as vertices's) which in turn forge a polygon these panels create a shell (or mesh) which is a visual representation of an object and/or character. Refer to Fig 1 for topogun vertices's and polygon example.
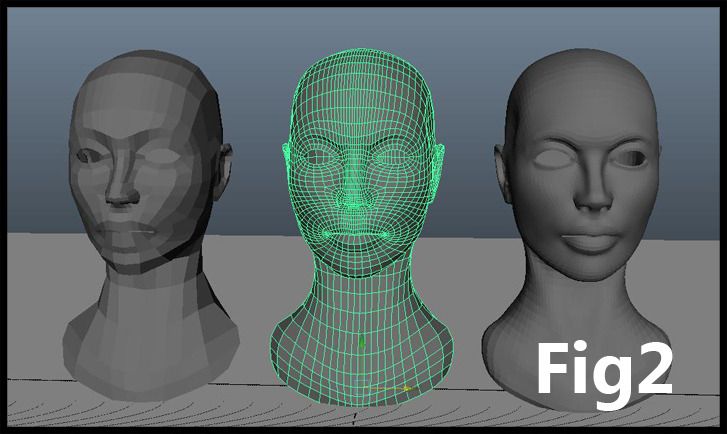

What is retopology?

Retopology is when one takes a high polygon mesh (a character for example) and redraws the polygons for the model at much lower density allowing ease for other required tasks such as animation. Refer to Fig 2 for high to low polygon head contrast.


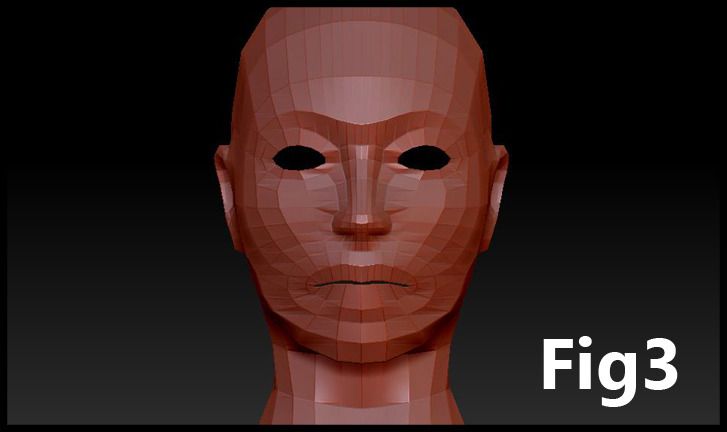
So why should I bother to retopologise?

Creating a low poly mesh is fundamental for other departmental tasks as well as performance. A lower poly mesh means a character rig (for example) will be easier to assign polygons, uvs will be easier to assign because there are less. Topology lays the ground work for a mesh which can be subdivided after rigging and uv mapping. Refer to Fig 3 for low poly head example.


The point of model topology is ultimately to make a persons job easier for them I for one would not want to have to assign a million polygon mesh to a skeletal rig because the points would be so difficult to define.

Last but not least why should I use Topogun?

Topogun allows you to add geometry with ease, you can place the vertices with a mouse or draw the lines that you wish to build the geometry from with a graphics tablet. Lines can be removed in sections and you can bake high resolution details onto low polygon meshes. The points never exceed the mesh and copy it exactly but allow the user the control to alter the wiring of their mesh without changing it visually.

If you don't believe me check the videos above...

Take it easy!
xXStItChXx

Wednesday 1 August 2012

Summer Learning: ZBrush 4R3 - Female Bust

Hey People,

I've been meaning to make a Zbrush post for a while as I began going through a chapter of one of my Zbrush books earlier this summer. It's a book called "Realistic Game Characters" by Ryan Kingslien. The book basically goes through the basics of Zbrush's interface through to creating an animation friendly female mesh. Chapter 1 looks specifically at sculpting a face from the default polysphere ZTool.

The first chapter focuses on the move brush, the standard brush, the dam standard brush, the clay brush, the polish brushes & the trim dynamic/trim adaptive brushes. Each of these have their own uses when sculpting into a piece of 3D geometry uses I will go over below.


I began my face by shaping the sphere to the dents of a skull using the move tool focusing particularly on the eye sockets, pulling out the nose and pulling a barrel shape for the teeth. I then used the move tool to adjust the back of the skull (seen in fig 4 above) I was darting between the move and standard brushes for these steps the standard mainly for its smoothing functionality and the move to set the sections where I thought appropriate.


Next I decided to revert the face down to its skull (something not in the chapter of the book but I was keen to learn). I grabbed one of my books on anatomy and began trying to forge a decent comparison before adding flesh. For this I had to bring the sphere to a much higher sub divide more so for the detail on the teeth shown in figure 7. This was all done primarily with the trim dynamic brushes which flatten geometry allowing one to create hard surfaces.


Re meshing was very good when it came to crowded vertices's particularly when you pull in a face or extend geometry the vertices's lock together creating nasty dents and bumps in your other wise perfect 3D model. The only problem with re meshing is you lose your detail and have to re sculpt it into your model.

However if you notice the difference between fig 9 and fig 10 it still maintains the shape of your model and you can move on without worrying too much about dents in your model. Figure 12 was my first stab at adding flesh not the best but it was a first stab at it.


At figure 13 I was where I wanted to be the face had the form (and a high sub divide) the only problem I had was finding the shape every time I adjusted something, something else just felt wrong. This is probably where I spent most of my time. The ear was particularly a difficult area as I had never studied it. After fig 14 I decided to get to re meshing again (figure 15) just to adjust certain parts of the head particularly the front which still felt rather large (figure 16).


Figure 17 was the final build of a few hours of experimentation I invested 2 more hours and got it to look more feminine paying particular attention to the cheek bones and lips. The lips were flattened by the trim adaptive brushes, adding oomph to the face was thanks to the clay and dam standard brushes allowing me to add clay where needed.

The ear was reinvented using masking at this point I still wasn't happy but I thought it wasn't bad for a first timer and as I said it was only chapter 1 of this book and I think I took it further then they wanted me to.


Figure 19 was the last in this series but I think I learnt quite a bit about anatomy from this dimensions into the skull that I had never considered. For Figure 19 I pulled the neck from the head and raised the sub divide again to give me the needed poly's without deformation. I lightly etched in some neck muscles but looking at the side the cranium still looks kinda small to me. The idea is to keep rotating it until you are happy with all sides.

Lastly, I adjusted the lighting ever so slightly and put a pearl material on before rendering it in basic shader fog. The flattened bottom was created using trim dynamic and trim adaptive. Adaptive flattens a greater range of of poly's just in case you were wondering.

Well that concludes this little post, I had meant to do this sooner so sorry for the delay. The face mesh I created in this tutorial I will be using for the demonstration of my new UV Map and re topology tools which I will post up here soon enough its kind of a series is you will.

Take it easy,
xXStItChXx